1. Create your account and access dashboard
Sign up, log in, and confirm you land in your store workspace. Check language, theme, and base settings.
Follow this complete guide to configure your store, load products, sell faster, and monitor performance.
Each step explains what to do, why to do it, and the expected result.
Sign up, log in, and confirm you land in your store workspace. Check language, theme, and base settings.
Set store name, currency, timezone, logo, and visual preferences. This ensures consistent screens, receipts, and reports.
Create product families, then add name, SKU, barcode, selling price, and cost. Enable stock tracking where needed.
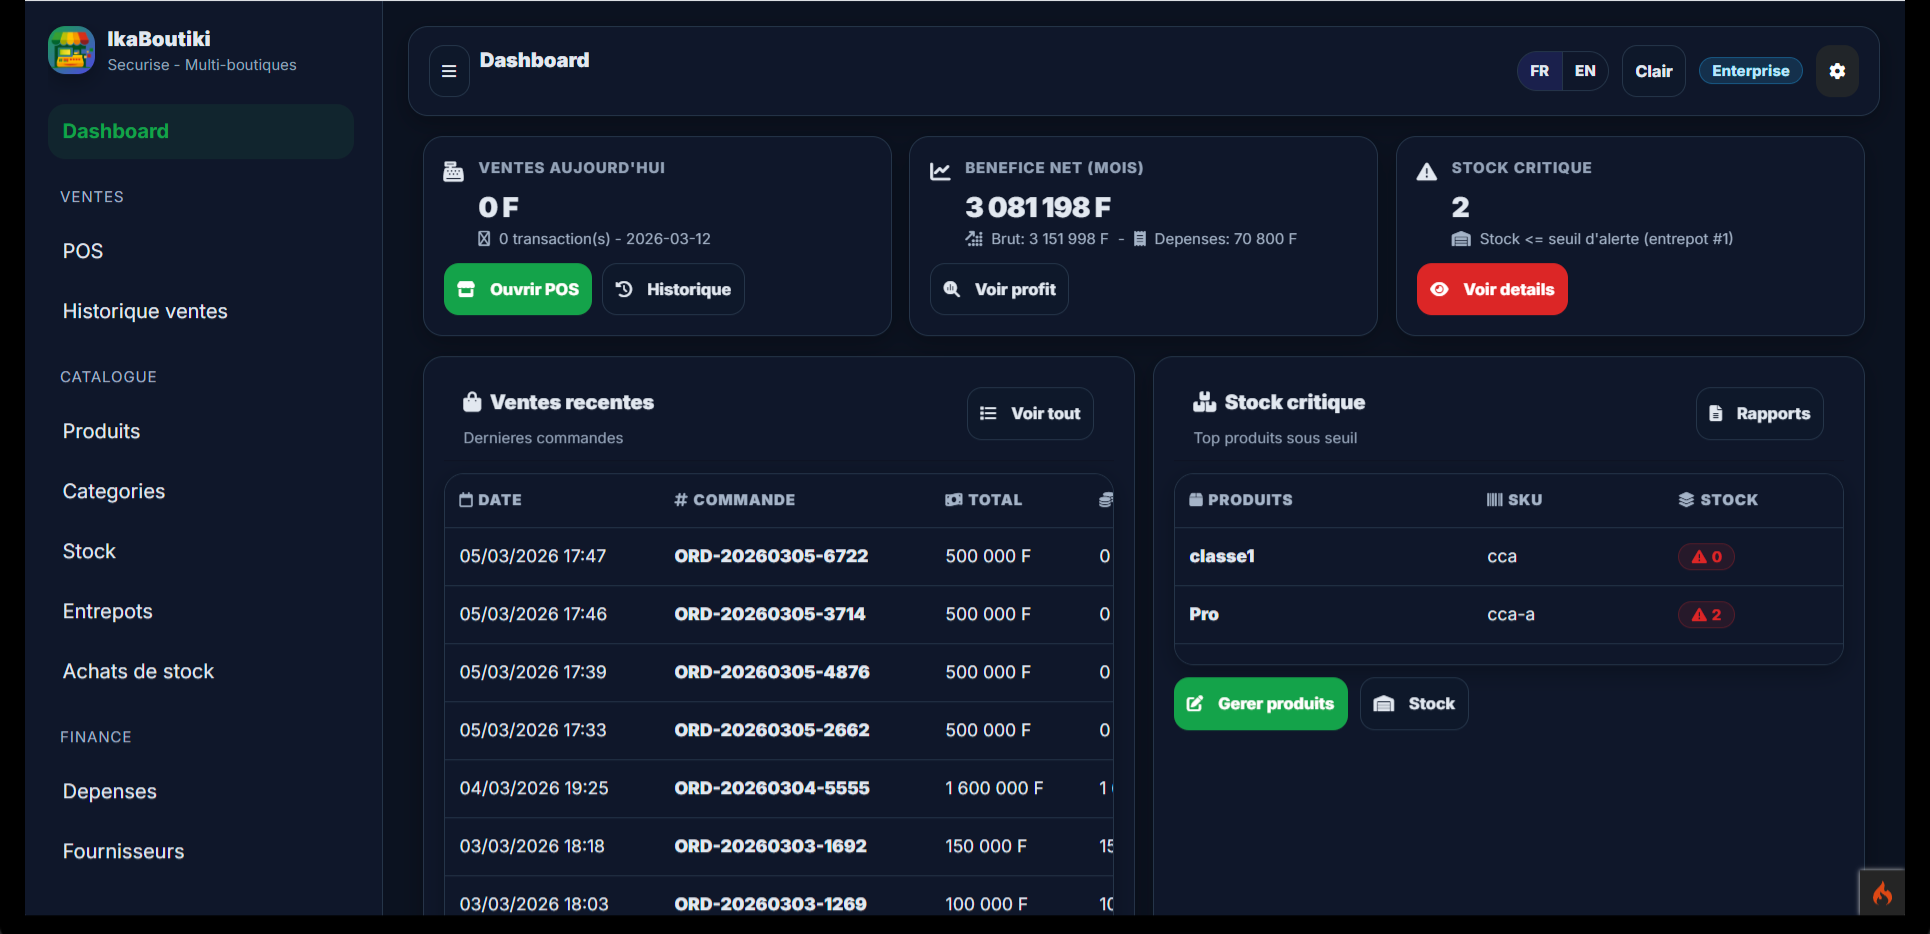
Load initial quantities by warehouse, then verify levels in stock module. Set low-stock thresholds to prevent stockouts.
Create suppliers, record purchases, and validate inbound stock lines. This builds a reliable cost and intake history.
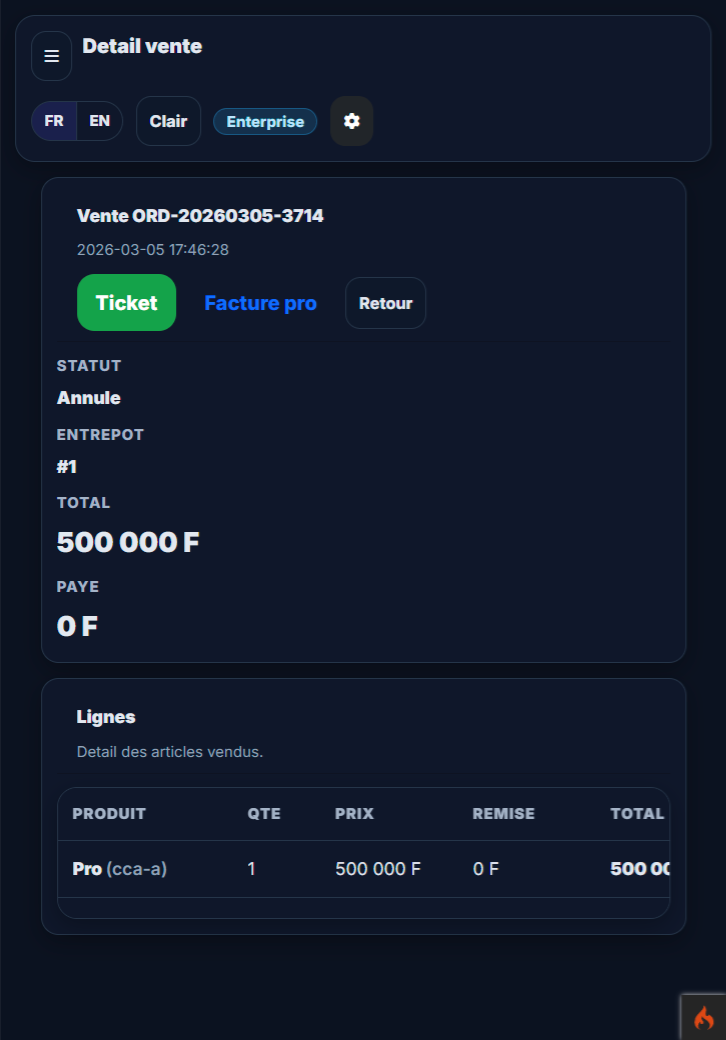
Use quick search or product cards, adjust qty/discount, finalize payment, then print receipt. Stock is deducted automatically.
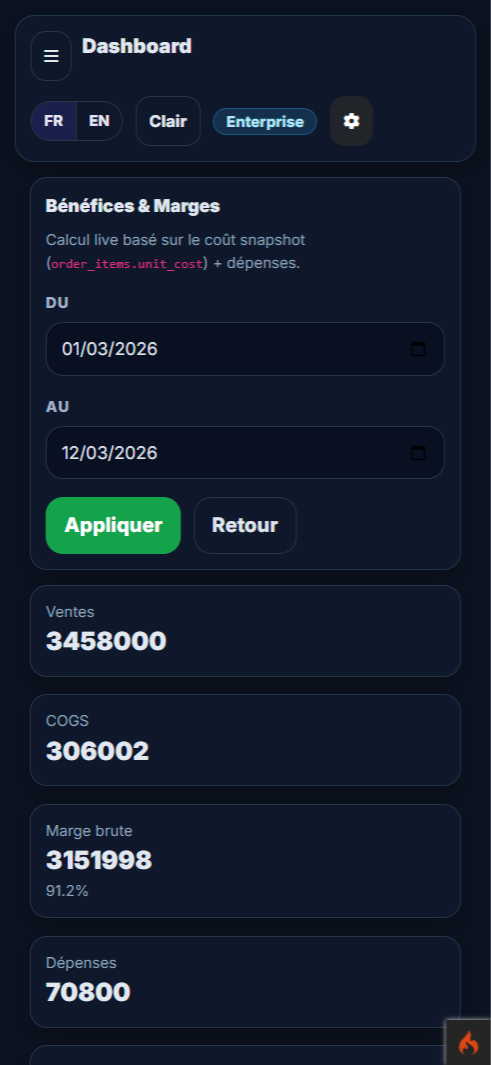
Review order history, record expenses, and use reports to monitor revenue, margin, and daily performance.
Create users, assign roles and permissions, then test each profile. This protects data and avoids unauthorized actions.
Click any screenshot to open full screen.
Each module below summarizes workflow, key actions, and operational watch points.
Recommended order to launch a store without stock, sales, and permission mistakes.
How to sell fast, edit a sale, manage multi-line payments, cancellation and archiving.
Track all payments, filter by period/method/account, and monitor wallet-based payments.
Manage customers, deposits, withdrawals, debt settlement and available wallet balances.
Manage supplier orders, partial receptions, payments, and pending undelivered quantities.
Track stock levels, movements, inbound/outbound operations and inter-warehouse transfers.
Run persistent warehouse stock-takes with recalculation based on movements during counting.
Open/close cash session, monitor discrepancies and period figures.
Yes, but loading initial stock is recommended to avoid inconsistent sales from day one.
Yes. Your choice is stored locally and reused automatically on next visits.
Use roles/permissions and test each profile to validate effective server-side access control.
Create your account and follow this tutorial step by step for a clean go-live.